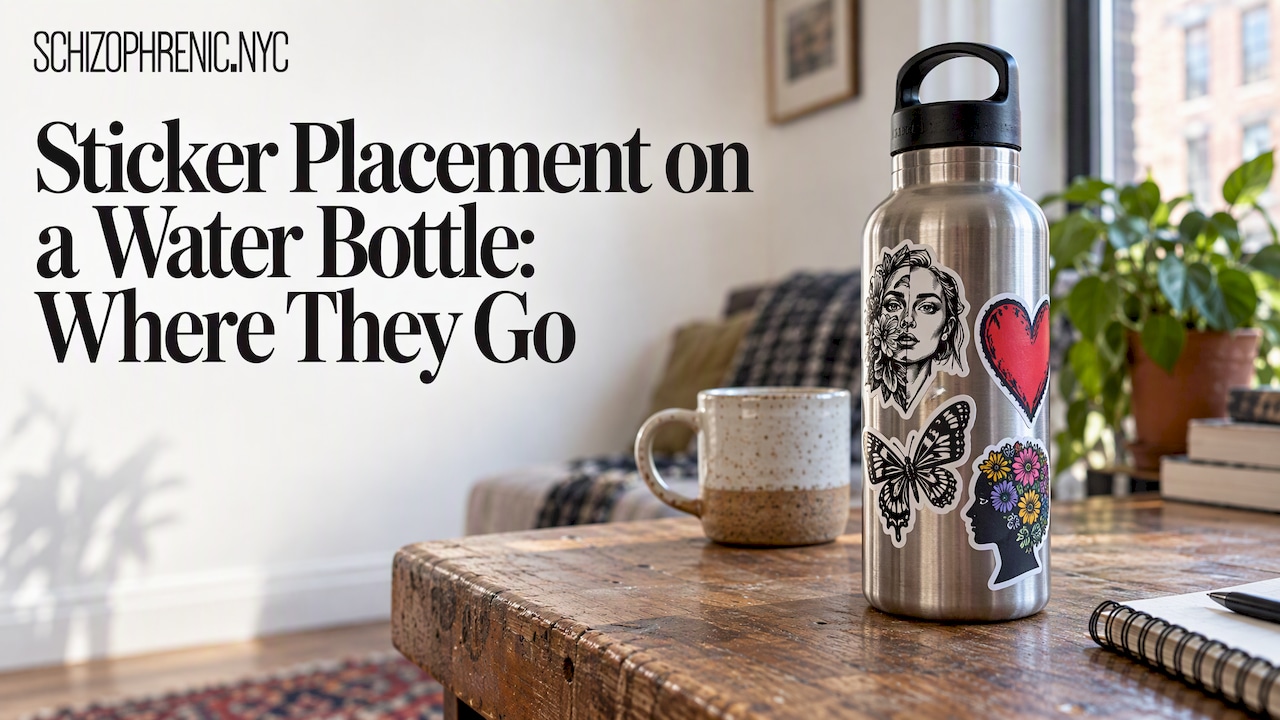
Put your stickers on the straight, cylindrical wall of the bottle, between the shoulder and the base. Keep them below the lid and rim, away from where your hand grips, and use smaller or die-cut shapes wherever the bottle starts to curve or taper. Clean the surface first, press from the center outward, and give the adhesive time before the first wash. That’s the whole recipe. The rest of this guide shows you how to make it work on your bottle, so the stickers you choose, especially the ones that say something about who you are, look intentional and stay put.
A water bottle is one of the most visible things you carry. It sits on your desk, in the gym, on a classroom table, at a support group meeting. For many of us at Schizophrenic.NYC, a sticker on a bottle is a small, everyday way to start a conversation about mental health. It deserves a little planning.
TL;DR
- Use the straight wall of the bottle between shoulder and base. It’s the most forgiving zone, and the one you’ll see most.
- Stay below the lid and rim and away from the grip area, so stickers don’t peel from your hands or lips.
- Keep sizes modest: about 2 to 4 inches for most bottles, with taller-than-wide shapes sitting best on the side.
- Wipe with isopropyl alcohol, press from the center out, and handwash the bottle to make the stickers last.
- Mock up the layout on a flat surface first, then build from one focal sticker toward the edges.
Table of Contents
- Know your bottle before you place anything
- The best zones, ranked
- How big should the stickers be?
- Plan the layout on a flat surface first
- Prepare the bottle
- Apply stickers without bubbles or wrinkles
- Material and care: how to make them last
- Layouts that work
- Our perspective
- Stickers worth putting on your bottle
- Common mistakes to avoid
- FAQ
- Sources
Know your bottle before you place anything
Before you choose a spot, look at the bottle as a map. Most reusable bottles have three or four distinct zones, and each one behaves differently under a sticker.
The straight wall. This is the long, cylindrical middle section. A sticker only has to curve in one direction here, so it lies flat without wrinkling. This is where your best and biggest stickers belong.
The shoulder and taper. Where the bottle narrows toward the neck, the surface curves two ways at once. Flat vinyl has to bend and stretch at the same time, and that’s what causes puckering, creases and lifting edges. Save this area for tiny stickers, or leave it bare.
The base. Bases often have rings, ridges or a rubber boot. Stickers don’t grip silicone well and they scuff quickly where the bottle meets a table or a cup holder.
The lid, threads and rim. Skip them. Your mouth and hands touch them constantly, and threads and seams interrupt the adhesive.
This matches the guidance in what sticker makers publish: the main body between shoulder and base is the most reliable placement zone, while tapers, base rings, silicone sleeves, threads and lids are poorer choices. Stickers on ribs and seams are the other trouble spot, so run your fingers along the bottle and feel for them before you commit.

A quick test: hold a sticker, or a paper cutout of it, against the bottle without peeling the backing. If the outline sits flat against the surface across its whole width, you’re good. If the edges float away from the bottle, either shrink the sticker or move it onto flatter ground.
The best zones, ranked
Here’s how we’d rank the areas of a typical bottle, from the most reliable to the least.
| Zone | How it behaves | What to put there |
|---|---|---|
| Center of the straight wall | Flat in one direction, easy to smooth | Your largest, most important sticker |
| Upper and lower straight wall | Still flat, a little closer to curves | Medium accents, tall shapes |
| Just above the base | Fine if there’s no ring or ridge | Small stickers, a signature design |
| Shoulder and taper | Compound curve, wrinkles easily | Tiny die-cut shapes only, or nothing |
| Base ring, silicone sleeve | Poor grip, high wear | Nothing |
| Lid, threads, rim | Constant contact | Nothing |
The back of the bottle counts too. Many people forget that the side facing away from you is what everyone else sees when you set the bottle down. If you want a message to be read by others, think about which side faces outward at your desk.
How big should the stickers be?
The common range for water bottle stickers is about 2 to 4 inches, according to Stickymade’s water-bottle guidance, and taller-than-wide shapes fit the side of a bottle best. Treat that as a starting range and adjust for your bottle.
A simple way to think about size is a visual hierarchy:
- One focal sticker, roughly 2 to 3 inches across. This is the one people notice first.
- Two or three medium accents, roughly 1 to 2 inches.
- A few small details, about half an inch to an inch, to fill gaps.
If your bottle is a standard 16 to 20 ounce size, a square sticker around 2 to 2.5 inches works well. A wide-mouth 32 to 40 ounce bottle can take something closer to 3 inches. Slim tumblers want narrow shapes, closer to 1.5 by 3 inches.
To get the numbers right for your own bottle, don’t guess. Use a flexible tape measure to find the height of the flat section between shoulder and base, then measure around it. Whatever you place needs to fit inside that flat height with some breathing room. Leaving a small margin from the curved top and bottom edges helps prevent bubbling and lifting at the edges.
Die-cut vs. rectangle
Sticker shape matters as much as size. A die-cut sticker follows the outline of the design, so there’s less empty film to wrinkle against the curve. A rectangle with a design printed inside has corners that tend to lift. If you aren’t sure which style you need, our guide to die cut vs. kiss cut stickers explains the difference and when each one pays off.
Plan the layout on a flat surface first
The fastest way to regret a sticker is to peel it off a bottle. Plan first.
- Lay out your stickers on a table. Arrange them the way you imagine them on the bottle, then take a photo. The photo gives you something to copy from once your hands are busy.
- Start with one central piece. Pick your focal sticker and build outward. You don’t need perfect symmetry. A slightly organic cluster often looks better than a rigid grid.
- Keep consistent gaps. Even spacing between stickers, a quarter inch or so, makes a layout look deliberate. Crowded stickers look messy, and overlaps can trap air.
- Mark your anchor points. A tiny pencil dot or a piece of removable tape on the bottle shows you where the focal sticker’s edges will land.
- Do a paper mock-up. Cut paper to the size of your sticker and tape it to the bottle at full scale. Turn the bottle. Check the front, the sides, and what shows when it’s sitting on a desk.
On a tall bottle, a vertical arrangement tends to look natural, with a column of two or three stickers running up the side. On a short, wide bottle, a loose cluster in the middle works better. And don’t try to cover every inch. Readable stickers with some empty space around them look better than a solid collage, and your message is more likely to be noticed.
Keep your main message away from the seam
Many bottles have a faint vertical seam. If a sticker with words sits across it, the text gets distorted and the sticker is more likely to lift along that line. Put your message-carrying stickers on the front, centered, and use the seam as an alignment guide instead. Place the seam at the back or side, and let it help you keep stickers straight.
Prepare the bottle
Adhesive sticks to clean surfaces and gives up on dirty ones. Thirty seconds of prep does more for longevity than any fancy sealing trick.
- Work somewhere clean. Dust and pet hair under a sticker become permanent features.
- Bring the bottle to room temperature. A cold bottle covered in condensation won’t take adhesive properly. If it’s been in the fridge, let it dry and warm up first.
- Wipe the area with isopropyl alcohol on a lint-free cloth, and let it dry completely. This removes oils, soap film and fingerprints.
- Steady the bottle. Set it on a towel or hold it with a firm, relaxed grip so it doesn’t roll while you work.
If you’re making your own printable stickers, the manufacturer’s instructions for waterproof printable sticker sets also ask for a clean, dry blank surface, according to Cricut’s published instructions. Same principle, same reason.
Apply stickers without bubbles or wrinkles
This is the part people rush. Slow down and the stickers go on like they were printed there.
- Peel only part of the backing. Hold the sticker by its outer edges, not the center, so you don’t touch the adhesive.
- Line up the sticker and touch down the center first. On a rounded bottle, the middle is your anchor.
- Smooth outward from the center. Use your thumb or a credit card. Work toward one side, return to the middle, then work toward the other side. Steady, moderate pressure beats fast, hard pressure.
- Chase any bubbles to the edge. Push them toward the nearest edge with the card. For a stubborn small bubble, a pinprick lets the air out; then press the area flat.
- Press the edges down firmly. Edges are where peeling begins.
- Fix creases early. If the sticker starts to wrinkle, lift it right away and lay it down again. Waiting makes the adhesive grab.
On vinyl, a little gentle warmth from a hair dryer on low can make the material more pliable on a slight curve. Keep the heat moderate and never point it at a plastic bottle for long.
Work on one sticker at a time and finish it before starting the next. If your layout has overlapping pieces, put the bottom layer down first and press it completely flat. Overlap is where air hides, so keep it minimal.
Material and care: how to make them last
Placement gets the sticker looking good. Material and care keep it that way.
Choose waterproof vinyl. A paper sticker will not survive a bottle that gets rinsed, carried in a bag and set in puddles of condensation. If you want to know what makes a sticker genuinely waterproof, we break it down in 3 things that make vinyl stickers truly waterproof.
Pick a finish you like. Glossy stickers pop and resist smudges, and matte stickers look softer and hide fingerprints. Our guide to matte vs. glossy stickers walks through which suits which design.
Wait before washing. Our rule of thumb is to leave a newly placed sticker alone for about 48 hours so the adhesive can settle.
Handwash. Even stickers that are waterproof and use permanent adhesive may last longer when you wash the bottle by hand, because dishwasher heat and detergents can reduce their longevity, per the same manufacturer instructions. A soft sponge and mild soap are enough. Avoid scrubbing directly across sticker edges.
Use the right bottle. A durable stainless steel or hard-sided bottle with a smooth finish takes stickers best. A soft, squeezable bottle flexes, and flexing breaks the bond.
Layouts that work
Here are a few starting points. Mix and adjust them for your own bottle.
The single statement. One 2.5 to 3 inch sticker, centered on the front. It’s clean, it’s bold, and it’s the easiest to apply. Good for a message you want people to read at a glance.
The vertical stack. Three stickers of descending size running up the side of a tall bottle, with even gaps. The largest sits at the middle height, the smaller ones above and below.
The cluster. A focal sticker with two or three small accents around it, loosely grouped on the flat wall. Think of it like a small collage, and leave room around the edges.
The story bottle. Pick stickers that reflect your own path. Maybe it’s a message about stigma, a reminder to take your meds, a favorite quote or an inside joke. Place the one that means the most at the center and let the others support it.

For advocacy and awareness stickers specifically, ask yourself who you want to read it. If it’s for you, put it where your eyes land when you drink. If it’s for conversation, put it on the outward-facing side. We wrote a similar guide for another everyday item, where to put stickers on a laptop, and the logic carries over: visibility first, protection second.
Our perspective
We started putting stickers on our own water bottles long before we sold them. When you live with schizophrenia, you spend a lot of time being told to blend in. A sticker on a bottle is the opposite. It’s small, it’s yours, and it says something about who you are without you having to explain it first.
That’s why placement matters to us. A message that peels at the corner or disappears into a wrinkle can’t start a conversation. A message sitting clean and centered on the flat part of a bottle can. People ask about it at the gym, in a waiting room, at work. Those are the moments that chip away at stigma, one question at a time.
So we design our stickers to be bold and readable, and we hope you’ll give them the space they deserve: the straight wall, a clean surface, a little patience. Treat the bottle like a tiny billboard you get to carry everywhere. Confidence can get you anywhere, and sometimes it starts with a sticker.
Michelle
Stickers worth putting on your bottle
If you’re looking for something with a message, we make stickers designed to be seen. Define Normal is a good one for a conversation starter. Our Don’t Be Paranoid, You Look Great stickers bring humor and warmth, and the Rorschach Test stickers make a striking focal piece. You can browse the full range on our schizophrenia stickers page, or head to the Schizophrenic.NYC shop to see everything else we make, including pillboxes, tote bags and apparel that pair well with a decorated bottle.
Common mistakes to avoid
- Placing stickers right below the lid. They get caught by your hand and mouth, and they lift first.
- Using one oversized sticker on a narrow bottle. The edges curl away from the surface.
- Skipping the cleaning step. This is the number one reason stickers peel early.
- Applying to a cold or damp bottle. Condensation blocks the adhesive.
- Putting the dishwasher on autopilot. Handwashing takes a minute and protects your design.
- Over-crowding. Dense layouts on a curved surface look busy and trap air.
FAQ
Where is the best place to put a sticker on a water bottle?
The straight, cylindrical wall between the shoulder and the base is the best spot. It curves in only one direction, so stickers lie flat. Stay below the lid and rim and away from where your hand grips the bottle.
What size sticker fits a water bottle?
Most bottles take stickers between about 2 and 4 inches, and taller-than-wide shapes sit best on the side. Measure the flat section of your own bottle with a flexible tape and keep a small margin from the curved edges. Use smaller stickers near any taper.
How do I stop bubbles and wrinkles?
Wipe the bottle with isopropyl alcohol, let it dry, and apply at room temperature. Press the center of the sticker first, then smooth outward with a credit card. If a crease starts, lift the sticker and lay it down again right away.
Can I put stickers on a bottle that goes in the dishwasher?
It’s safer to handwash. Even waterproof stickers with permanent adhesive can wear faster from dishwasher heat and detergents. Wait about two days after applying before the first wash, then use mild soap and a soft sponge.
Should I overlap stickers on a water bottle?
A little overlap is fine if you press the bottom layer completely flat first, but it can trap air. For a cleaner look, leave a small gap between stickers. On curved areas, spacing them out is usually the safer choice.
Sources
- Printable Waterproof Sticker Set Instructions, Help Center
- Stickers on water bottles and tumblers, Help guide
Recommended
- Matte vs Glossy Stickers: Which Finish Should You Pick?
- 3 Things That Make Vinyl Stickers Truly Waterproof for Advocacy Gear