Die cut means the blade slices all the way through the sticker and its liner, so you get a single shape with no extra backing. Kiss cut means the blade cuts only the top sticker layer, leaving the liner underneath intact. If you’re printing one hero shape, like a logo decal, go die cut. If you’re printing a sheet, a small run of intricate shapes, or anything that needs to peel fast, go kiss cut. The rest of this guide covers file setup and the production questions that keep either format from going wrong.
TL;DR:
- Die cutting provides a fully cut shape with no border, offering a premium look suitable for standalone logos and high-end branding.
- Kiss cutting leaves a border or backing sheet intact, making it ideal for sheet designs, small intricate shapes, and automated roll-fed applications.
- The main cost difference stems from die setup, with die cut being more expensive for single shapes and kiss cut providing a more versatile, lower-cost option on sheets.
- Proper file setup includes a clear cut path layer, bleed, safe zones, and confirmed layout, which are critical for accurate production and high-quality results.
- Small batch testing and proofs are essential to catch depth and alignment issues before full production, especially for fine details and fragile designs.
Table of Contents
- What Is Die Cut? Definition, Materials, and Common Uses
- What Is Kiss Cut? Definition, Advantages, and Common Uses
- Die Cut vs Kiss Cut: Side-by-Side Comparison
- When to Choose Die Cut vs Kiss Cut for Your Project
- File Setup: Cut Path, Bleed, and Safe Zones
- Production Considerations: Tolerances, Roll Quality, and Equipment
- Quick Ordering Checklist for Die Cut or Kiss Cut Stickers
- A Practitioner’s Note on Testing Before You Commit
- Ready-Made Advocacy Stickers From Schizophrenic
- Sources
- FAQ
What Is Die Cut? Definition, Materials, and Common Uses
Die cutting is actually the umbrella term for cutting material into a shape. But in sticker talk, “die cut” almost always means the blade goes through both the sticker face and the release liner beneath it, following the exact outline of your artwork. Peel one off the backing sheet and there’s no leftover border, no visible rectangle, just the shape you designed.
That clean silhouette is why die cut reads as the more premium format. A logo sticker shaped like an actual logo looks intentional in a way a square sticker with a logo printed on it never quite does.
Die cut works on most standard sticker materials, vinyl, paper, and holographic stock among them, and it holds up well on:
- Single-item retail packaging where the shape itself is part of the branding
- Laptop and water bottle decals meant to be seen up close
- Product labels where a custom contour separates you from shelf competitors
- Promotional giveaways that need to look finished straight out of the bag
What Is Kiss Cut? Definition, Advantages, and Common Uses
Kiss cutting is a specific type of die cutting where the blade only scores the sticker layer, leaving the liner underneath uncut. Every kiss-cut sticker is technically die cut. Not every die cut is kiss cut, which is a distinction worth knowing if you’re ever explaining a job to a converter over the phone.
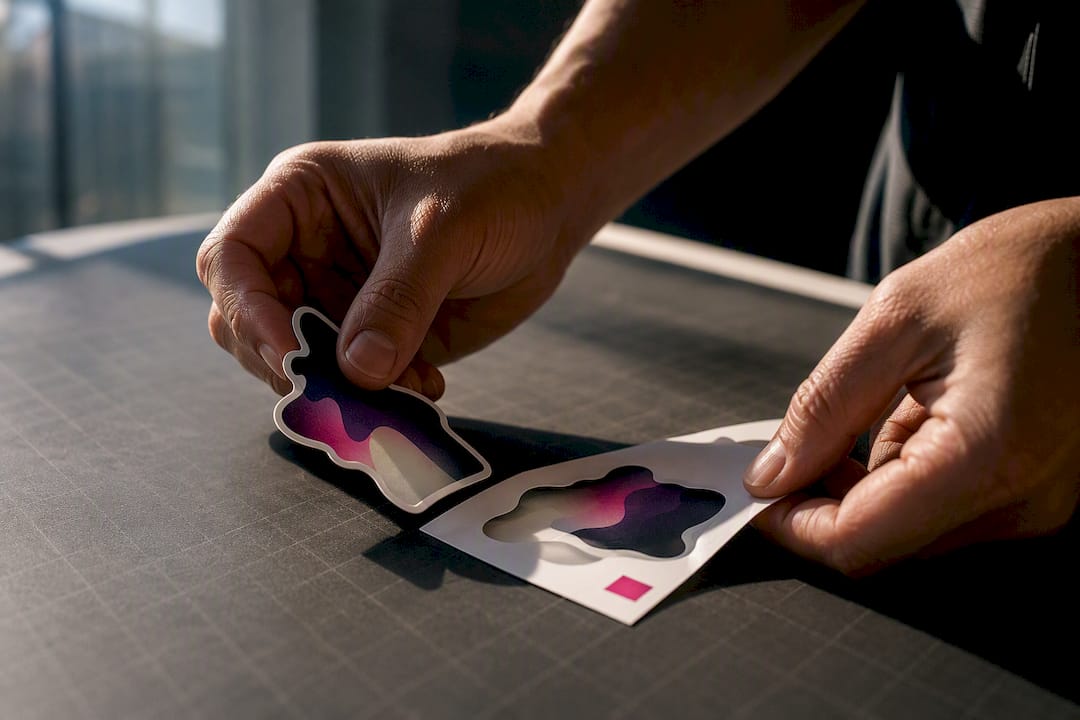
The result: your sticker sits on a full backing sheet or roll, like a stamp waiting to be pulled from its page. That intact liner does real work. It protects edges during shipping, keeps small parts from getting lost, and lets someone peel a sticker off in one motion instead of hunting for an edge to lift.
Kiss cut tends to win for:
- Sticker sheets with multiple designs packed onto one page
- Small, intricate shapes where individual die cutting would be fussy or fragile
- Roll-fed labels destined for automated application
- Designs that intentionally use a printed border or frame, an option die cut doesn’t offer without extra artwork
Die Cut vs Kiss Cut: Side-by-Side Comparison
Once you understand the definitions, the real decision comes down to four practical differences: cut depth, peel behavior, edge protection, and cost.
Cut depth is the mechanical root of everything else. Die cut goes full depth through sticker and liner. Kiss cut stops at the top layer, which means the finished shape keeps a backing border that die cut simply doesn’t have.
Peeling tells a similar story from the user’s side. A kiss-cut sticker lifts off in one smooth motion because the liner gives your fingers something to grip. A die-cut sticker on its own backing can be trickier to pick up, especially if the shape is small or has thin points.
Here’s how the two stack up:
| Factor | Die Cut | Kiss Cut |
|---|---|---|
| Cut depth | Through sticker and liner | Through sticker only |
| Finished shape | Custom silhouette, no border | Border or full sheet backing remains |
| Peel experience | Can be fiddly on small shapes | Fast, one-motion peel |
| Edge protection in transit | Exposed edges | Liner shields edges until use |
| Best for | Single premium items | Sheets, multi-packs, small runs |
| Typical cost driver | Custom die setup per shape | Complex depth control, lower waste on sheets |
Cost differences usually come down to setup, not the cut itself. A custom die for a single intricate shape adds tooling cost that a shared kiss-cut sheet layout avoids, since one pass can score dozens of designs on the same liner.
When to Choose Die Cut vs Kiss Cut for Your Project
Match the format to how the sticker gets used, not just how it looks on screen. A few decision rules make this easier:
- If it’s one hero design meant to stand alone, go die cut. Flagship logo decals, brand stickers for laptops, and single product labels benefit from the clean, shape-matched edge.
- If it’s a sheet of multiple designs, go kiss cut. Planner sticker sheets, sticker packs sold as a set, and event giveaway sheets all depend on that shared backing to stay organized until someone peels one off.
- If the shape is small or highly detailed, lean kiss cut. Tiny die-cut pieces can tear or curl during handling; a liner backing keeps fragile shapes intact.
- If speed of application matters, lean kiss cut. Kids peeling stickers at a birthday party or staff handing out labels at a booth move faster with a kiss-cut sheet than with loose die-cut pieces.
- If the sticker gets machine-applied, kiss cut on a roll is the standard. Automated applicators are built around continuous roll-fed liners, not individual die-cut pieces.
Think about who’s peeling the sticker and how. A designer applying one careful decal to a laptop has different needs than an event staffer handing out fifty stickers an hour.
File Setup: Cut Path, Bleed, and Safe Zones
Printers need a few specific things in your file before they can run either cut type, and skipping one of them is the fastest way to end up with a white sliver around your design or a shape that prints as a plain rectangle instead of your custom contour.
Set up your file with:
- A dedicated vector cut path layer, usually named “CutContour” or “Die Line” and set to a spot color the printer’s software recognizes
- Bleed that extends your artwork slightly past the cut path so tiny registration shifts don’t expose white edges
- A safe zone that keeps text and important details away from the cut line itself
- Correct clipping paths or a transparent background on die-cut files, since some workflows default to a rectangle if the artwork isn’t set up properly
- For kiss-cut sheets, a layout showing how designs sit relative to each other on the backing, since spacing affects how easy each piece is to peel
Pro Tip: Always request a digital proof before full production, and check it specifically for the cut line position, not just the colors. A proof that looks right on screen can still cut through the wrong spot if the cut path layer wasn’t set up cleanly.
Export as a layered PDF or AI file with the cut path clearly separated from the print layer. That separation is what lets a printer’s cutting software read your intent instead of guessing at it.
Production Considerations: Tolerances, Roll Quality, and Equipment
Kiss cutting demands tighter tolerances than most people expect. Cut too shallow and the sticker won’t release from the liner when someone tries to peel it. Cut too deep and you risk damaging the liner or causing adhesive to leak through, which shows up later as tacky residue or stickers that won’t sit flat. Reputable converters monitor that depth to fine tolerances for exactly this reason.

Roll tension matters just as much if your stickers are headed for a machine applicator. Inconsistent tension during kiss cutting can shift parts out of alignment on the roll, which then jams automated equipment on the receiving end.
Equipment choice depends on volume. Rotary die presses handle large, consistent runs efficiently. Laser and digital cutting suit smaller batches or designs that change frequently, since they skip the cost of building a physical die.
Before you commit to a full run, ask your printer:
- Can I see a physical sample, not just a digital proof?
- What’s the typical scrap rate for a job like mine?
- Is this roll compatible with my specific applicator, if I’m applying by machine?
Quick Ordering Checklist for Die Cut or Kiss Cut Stickers
Send this list to your printer, or run through it yourself before you submit a file:
- Cut path layer named clearly and set as a spot color, separate from the print layer
- Bleed and safe zone measurements confirmed and applied
- Cut type stated explicitly: die cut or kiss cut, no ambiguity
- Layout specified: individual die-cut pieces or a kiss-cut sheet, and how many designs per sheet
- Material, laminate, and finish chosen, since these affect both durability and how the design pairs with your chosen finish
- Quantity and file format confirmed, along with resolution for any raster elements
- Sample or proof requested before the full print run goes to press
Pro Tip: If your design has fine detail or thin points, always ask for a small sample batch first. A handful of test stickers costs almost nothing compared to reprinting a few hundred that won’t peel cleanly.
A Practitioner’s Note on Testing Before You Commit
If I’m printing a multi-pack of planner stickers, I go kiss cut every time, the sheet format just makes sense for how people actually use them. A single hero logo decal gets die cut instead, because that clean edge is the whole point. Either way, order a proof and test the peel yourself before greenlighting a full run. Sample batches catch roll and depth issues that are far cheaper to fix on ten stickers than on ten thousand.
— Michelle
Ready-Made Advocacy Stickers From Schizophrenic
If you’d rather skip the file setup and die-versus-kiss decision entirely, Schizophrenic already offers finished sticker and button merch built around original mental health advocacy artwork, no cut-path layers or proof rounds required. Every piece carries bold, conversation-starting art designed to spark dialogue around schizophrenia and mental illness. Pair one with mental health buttons for a small merch bundle, or browse the schizophrenia stickers collection to see what’s currently available. If you want something to wear alongside them, the mental health tank tops make an easy add to the same order.
Sources
- Die cut, kiss cut and through cut explained — StickerApp Sticker Academy
- Kiss Cut vs Die Cut Stickers — Digital Polo Blog
- Kiss cut and through cut die cutting methods — LAMATEK
FAQ
Why is die cut more expensive than kiss cut?
Die cut usually requires custom tooling shaped to your exact outline, while kiss cut can score multiple designs on one shared sheet, spreading setup cost across more pieces and lowering waste.
What’s the difference between kiss cut and die cut stickers?
Die cut slices through both the sticker and the liner for a clean, borderless shape; kiss cut slices only the sticker layer, leaving the liner intact underneath as a backing.
Why is it called kiss cut?
The blade only “kisses” the top layer of material, cutting the sticker without cutting through the liner beneath it, which is where the name comes from.
Can you kiss cut on any surface?
Kiss cutting works on most standard sticker and label materials, but it depends on consistent roll quality and depth control; very thick or uneven stock can make clean partial cuts harder to achieve.